April 30, 2010
For Digital Images, Resolution Matters
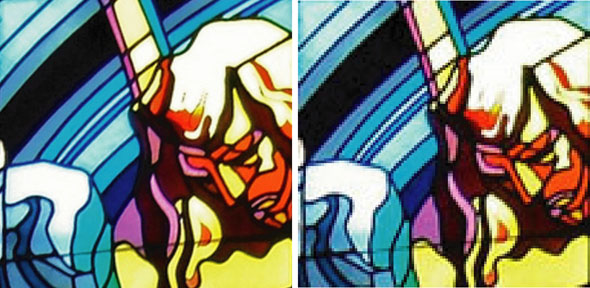
Nearly everyone in stained glass now archives and promotes their work using digital images. Because of this it is important to understand the concept of image resolution and to be able to determine whether an image is high or low resolution. The image on the left is high resolution and on the right it is low resolution. Using low resolution images in marketing your work can make you look sloppy and unprofessional.

So, resolution matters.
Richard Gross of the Stained Glass Association of America recently published 2 articles called "Resolving Resolution" in the Winter and Spring 2010 issues of Stained Glass Quarterly. He goes on at length about the cameras, and what pixels are, etc.
My take on it is simple - think in terms of pixels. You don't even need to know what a pixel is exactly. What you do need to know is how to determine what size an image is in pixels. Then, if you know how the image will be seen (web? inkjet printing?, book publication?), you will know if the digital file is usable. It takes a little getting used to, but it really is quite simple.
A little further explanation, a few graphics and a handy chart below the fold...
Resolution is determined by the number of pixels per inch. The more pixels, the higher the resolution. In general, you want to start with the highest number of pixels you can.
So, the general rule is that the higher resolution the better. But what if you've been given a file and want to know if it will work for what you need it for?
How to determine what is a low resolution image or a high resolution image?
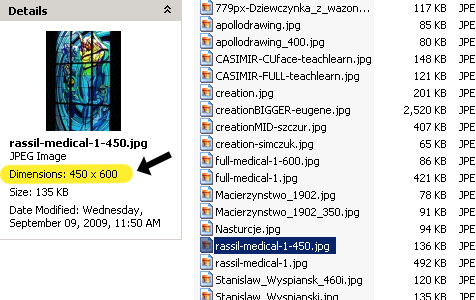
First, look for the dimension in pixels. You can do this from a folder on your computer. You do not need computer graphics software.
Select a digital image on a windows PC and you will see the specifications for that image appear to the side. I've highlighted where to look. This shows that the image is 450 pixels wide by 600 pixels high, which is low resolution.

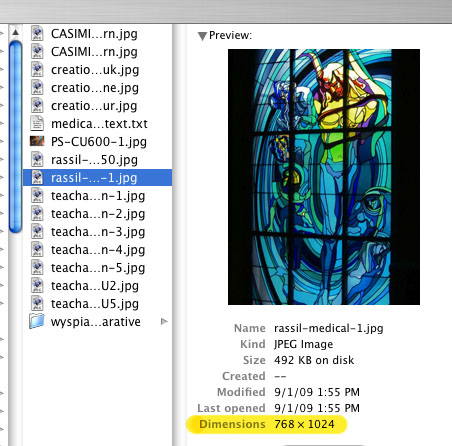
Here is the way it looks on a Mac, and again the dimension is in pixels. You will note that this is a slightly higher resolution, at 768 pixels wide by 1024 pixels high. This could used, in a limited manner, in digital printing but still would not pass muster in offset printing, unless printed very small..

Next, how to tell if the file you have is usable for the task at hand?
Are you using an image for a website or blog? Or for digital printing, which would include home or office printing on inkjet or laser printers. Are you submitting images to be printed in a magazine or book, where the image will be printed on an offset press?
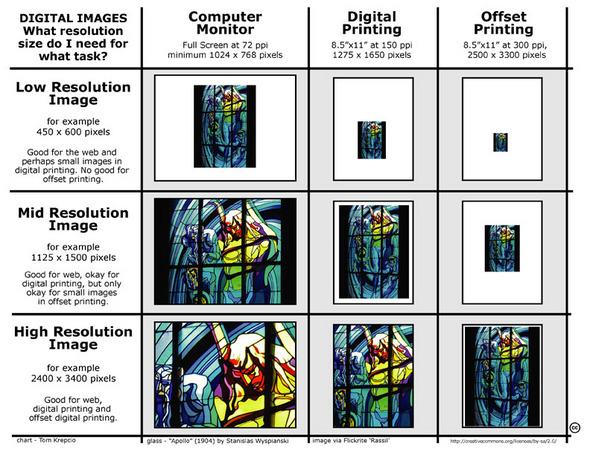
This is a chart that shows how different resolution images size up in different output scenarios. As you look across the chart you will see how big the image will be in the 3 different scenarios, without image degradation.
Click on the image to see a larger image, or download the Resolution Chart PDF

Keep in mind that this is a general rule of thumb and does not cover every situation. Not to mention the obvious, that if you do not have a high quality photograph in the first place, if it is out of focus or poorly lit, then the resolution is irrelevant.
One key rule to remember.. You can turn a high resolution image into a low resolution one, but you can never turn a low resolution image into a high resolution one. It will look jagged and fuzzy and terrible. Always take your digital pictures at the highest resolution, especially if you ever think they might be printed at any time in the future. You will have much bigger files to deal with, but the trade-off is worth it.
You're a professional. Look like it!
Posted by Tom at April 30, 2010 07:00 AM